
Installing a floor access hatch correctly is critical. A poorly installed hatch creates a trip hazard, traps water, and may fail structurally under load. This step-by-step guide covers everything from site preparation to final adjustment.
Tools and Materials You Will Need
- Angle grinder or jigsaw for cutting the opening
- Spirit level and steel square
- Drill with anchor bits appropriate for the substrate
- Anchors or self-drilling screws (as specified by the manufacturer)
- Tile adhesive, grout, or floor finish material as applicable
- Silicone sealant for waterproof applications
- Tape to protect the frame during construction
Step 1: Measure and Plan
Before cutting anything, confirm the installation dimensions from the product datasheet — this is the size of the opening you need to cut, not the outer frame dimension. Note the frame depth: the bottom of the frame must clear any structural elements, pipework, or drainage channels below.
Identify the finished floor level and calculate the required frame height so the lid will be flush with the finished surface after the floor covering is applied. This is the most common source of error — setting the frame too high or too low makes flush-flush impossible to achieve.
Step 2: Cut the Opening
Mark the opening dimensions on the floor surface with chalk or a pencil. Cut 5–10 mm larger on all sides than the installation dimensions to allow for frame adjustment and grouting. For concrete substrates, use a diamond blade. For timber floors, a jigsaw gives cleaner edges.
Ensure cut edges are vertical, not angled, particularly at the corners. A square opening is essential for the frame to sit correctly.
Step 3: Prepare the Substrate
Remove all loose material and dust from the opening edges. For concrete floors, wet the edges before applying any cementitious grout. For applications requiring waterproofing, apply a waterproof membrane to the opening edges and up to 100 mm onto the surrounding floor surface, lapping it under where the frame will sit.
Step 4: Set the Frame
Lower the frame into the opening and check it is level on all four sides using a spirit level. The frame must be horizontal to within 2 mm across its full width. Shimming with mortar or plastic packers is acceptable.
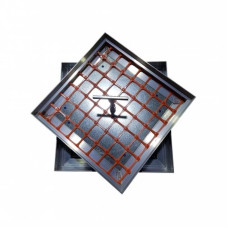
For a recess-tray model, confirm the top of the recess tray is set at the correct height below finished floor level to accept the full thickness of your floor covering. Tile adhesive bed and tile thickness must both be accounted for.
Step 5: Fix the Frame
Fix through the anchor holes in the frame using the anchors or screws specified in the installation instructions. The number and type of fixings is specified for the declared load rating — do not substitute or reduce the fixing count. For concrete substrates, chemical anchors give the strongest hold.
Fill the gap between the frame and the substrate with non-shrink cementitious grout or expanding polyurethane foam depending on the application. For waterproofed areas, use grout rather than foam.
Step 6: Protect and Finish
Apply masking tape over all frame faces before laying tiles or applying screed. This prevents adhesive contamination of the frame's sealing surfaces, which would affect the door's weather seal or hygienic seal.
Lay the floor covering up to and butting tightly against the frame. For tiled applications, cut tiles neatly to the frame edge. Grout the tile joints up to the frame, then apply a bead of flexible sealant between the tile and the frame rather than grouting this joint — this accommodates differential movement and prevents cracking.
Step 7: Adjust the Lid and Gas Struts
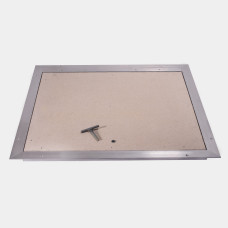
Once the floor covering is complete and any adhesive has cured, open the lid and adjust the gas struts to balance the combined weight of the lid and the floor covering infill. Most SANLUK gas struts have an adjustment screw; turn clockwise to increase resistance. The correctly adjusted lid should stay open at approximately 80–90 degrees without requiring the user to hold it.
Test the lid closure several times. It should close smoothly and sit perfectly flush with the surrounding floor, with no rocking or high spots. Minor adjustments to the hinge alignment can be made at this stage.
Common Mistakes to Avoid
- Setting the frame at the wrong height — always calculate finished floor level including adhesive bed
- Cutting the opening too small — allow 5–10 mm tolerance on all sides
- Under-fixing the frame — always use the full specified anchor count and type
- Grouting the frame-to-tile joint — use flexible sealant, not grout, at this interface
- Failing to protect the frame during floor laying — adhesive contamination causes sealing problems
- Not adjusting gas struts after infill — the struts are set for lid weight only at the factory
For product-specific installation details, always refer to the installation instructions supplied with your SANLUK hatch. Contact us at info@sanluk.lv if you need technical support.